
Add a Passkey to This Device
You logged in using a passkey from another device. For faster access next time, add a passkey to this device.
Benefits:
- Faster login with just your fingerprint or face
- No need to use your phone each time
- Works even when offline
Keyboard Shortcuts
- Help Center
- Group Members Manual
Restriction: This feature is available only in Premium groups, Enterprise groups, and legacy Free groups.
If a wiki page is lengthy, you can organize it into sections using headers, and then add a table of contents at the top of the page. Group members will then be able to click or tap a header link in the table of contents to go directly to that section on the page.
Note: These instructions assume you are using the HTML editor.
To add a table of contents to a wiki page:
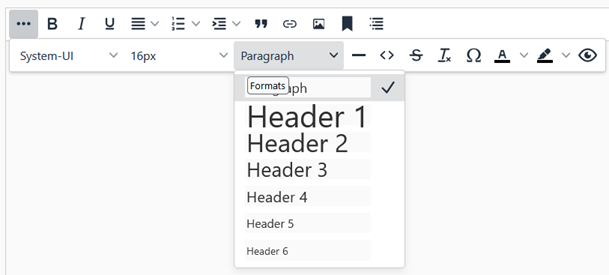
- While you are creating or editing the wiki page, apply header elements to the section titles on the page because the table of contents is built from headers. To apply a header element, select the applicable header level from the Formats menu on the wiki editor toolbar:
- Desktop browser: Click the ... (ellipsis) button at the left to display an additional toolbar, then select a Header style from the list.
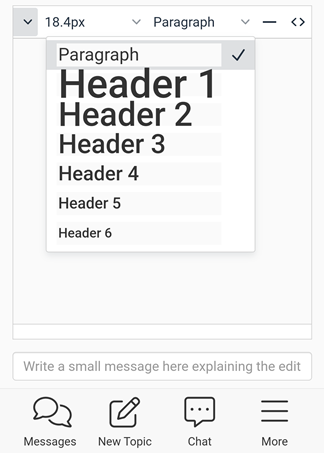
- Mobile device: Tap and hold the toolbar, scroll to the right until you see the Formats menu ("Paragraph" is the default format), then tap the menu and select a Header style from the list.
- Desktop browser: Click the ... (ellipsis) button at the left to display an additional toolbar, then select a Header style from the list.
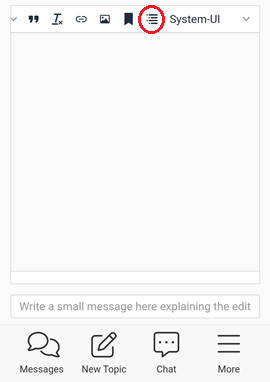
- When you are ready to add the table of contents, click or tap the location in the page where you want to insert it (the table of contents does not have to be at the top of the page, although that location is typical), then select the Insert table of contents icon on the toolbar. See the examples below.
Desktop browser:

Mobile device:
! Important: The location where you insert the table of contents should be a paragraph element with no additional formatting. That location should not be a header element or have any other formatting—otherwise, the format of the resulting table of contents will be affected accordingly. - In the Table of Contents popup:
- Enter a new title if desired (the default is “Contents”).
- Select the maximum level of headers you want listed in the table of contents.
- Click or tap Insert. The editor inserts a TOC code at the location where the table of contents will appear after you save the page. For example, the code [TOC: Contents: 3] specifies that the title will be “Contents” and three levels of headers will be listed.
- Go to the bottom of the page and click or tap the Save Page button. On the page, the table of contents appears where you inserted it.
Note: Heading numbers are added automatically, and you cannot change or remove them.
This wiki table of contents example shows two header levels:

In the example, the “Chorus Member Handbook” title above the table of contents is a paragraph element formatted with bold, italics, and a large font size. That title is not formatted as a header element because then it would also be listed in the table of contents, which could look odd to readers. You might have to experiment with the formatting and placement of titles and headers as well as the location of the table of contents to get the page to look the way you want it to.